Saturday, 13 July 2013

The Big Surprise Project Revealed - Part 2

October 2013

Once I had the colours and the yarn for this project, I had to decide on which blocks to make, and with which colours, and then how many of each block and how to lay out the whole blanket! Suddenly this was feeling a bit overwhelming, but I pushed through, trying to focus on one thing at a time.

Selecting the Blocks

I pulled out my trusty 200 Crochet Blocks book (I've made such good use of that book!), and immediately decided on a few favourite blocks from the group project - particularly the Into the Blue (the blue concentric circles below), Fretwork (the bright blue and green and brown granny-square one below), and Begonia (the brown and green one with a flower in the centre below) patterns.

Next I searched through the book for a couple of blocks that would go well with those three. I decided on Willow (the two-tone green one below), and Ziz-zag Bobbles (the striped one).

Designing the Layout

I took a picture of each of the squares from the pattern book, and loaded them into Powerpoint, and played around with them, creating a few different designs to see what might work. I knew these wouldn't be the final colours, but it was something to start with.

Design #1 is a sort of checkerboard pattern, pretty straight forward and balanced.
Design #2 is a diagonal pattern, using the striped square to create a braided or herringbone look:
Design #3 is inspired by a picture frame.
I sent these three layouts (in black-and-white versions to avoid confusion from the not-yet-finalized colours) via email to my mother and to a couple of friends to get their feedback - and of course they all had very different opinions! I finally decided that design #1 was a bit too boring and "normal", and design #3 would look better as a rug. I thought that the diagonals on design #2 would look like they were flowing, and would look interesting when draped over a couch or a lap (which would be the main uses for a blanket like this, rather than spread out like a quilt). I decided that #2, or some variation on it, would be my starting point, but that no final decision could be made until I had decided on the colours for each square.

Selecting Colours for the Blocks

The colour scheme on the Fretwork pattern (bright blue, with a couple of shades of green and brown) as well as the colour scheme of the Begonia pattern (burnt orange, green and brown), had been the main inspirations for the yarns I had picked.  So I decided to first try to replicate those squares.

I started with the Begonia pattern (see below), which has always been my favourite. I tried to replicate the colour scheme in the book, but my first two tries both fell flat (see first and second below). My colours were too different from those in the book, and the greens were too much of a contrast. So after consulting with my mother-in-law, I came up with the design on the right, which I was quite pleased with. It gives the earthy effect I was hoping for, and it includes those little punches of bright orange and green to liven things up a bit.


Here's the final result (same as on the right above, but better lighting) - I have a feeling this one will be my favourite block...


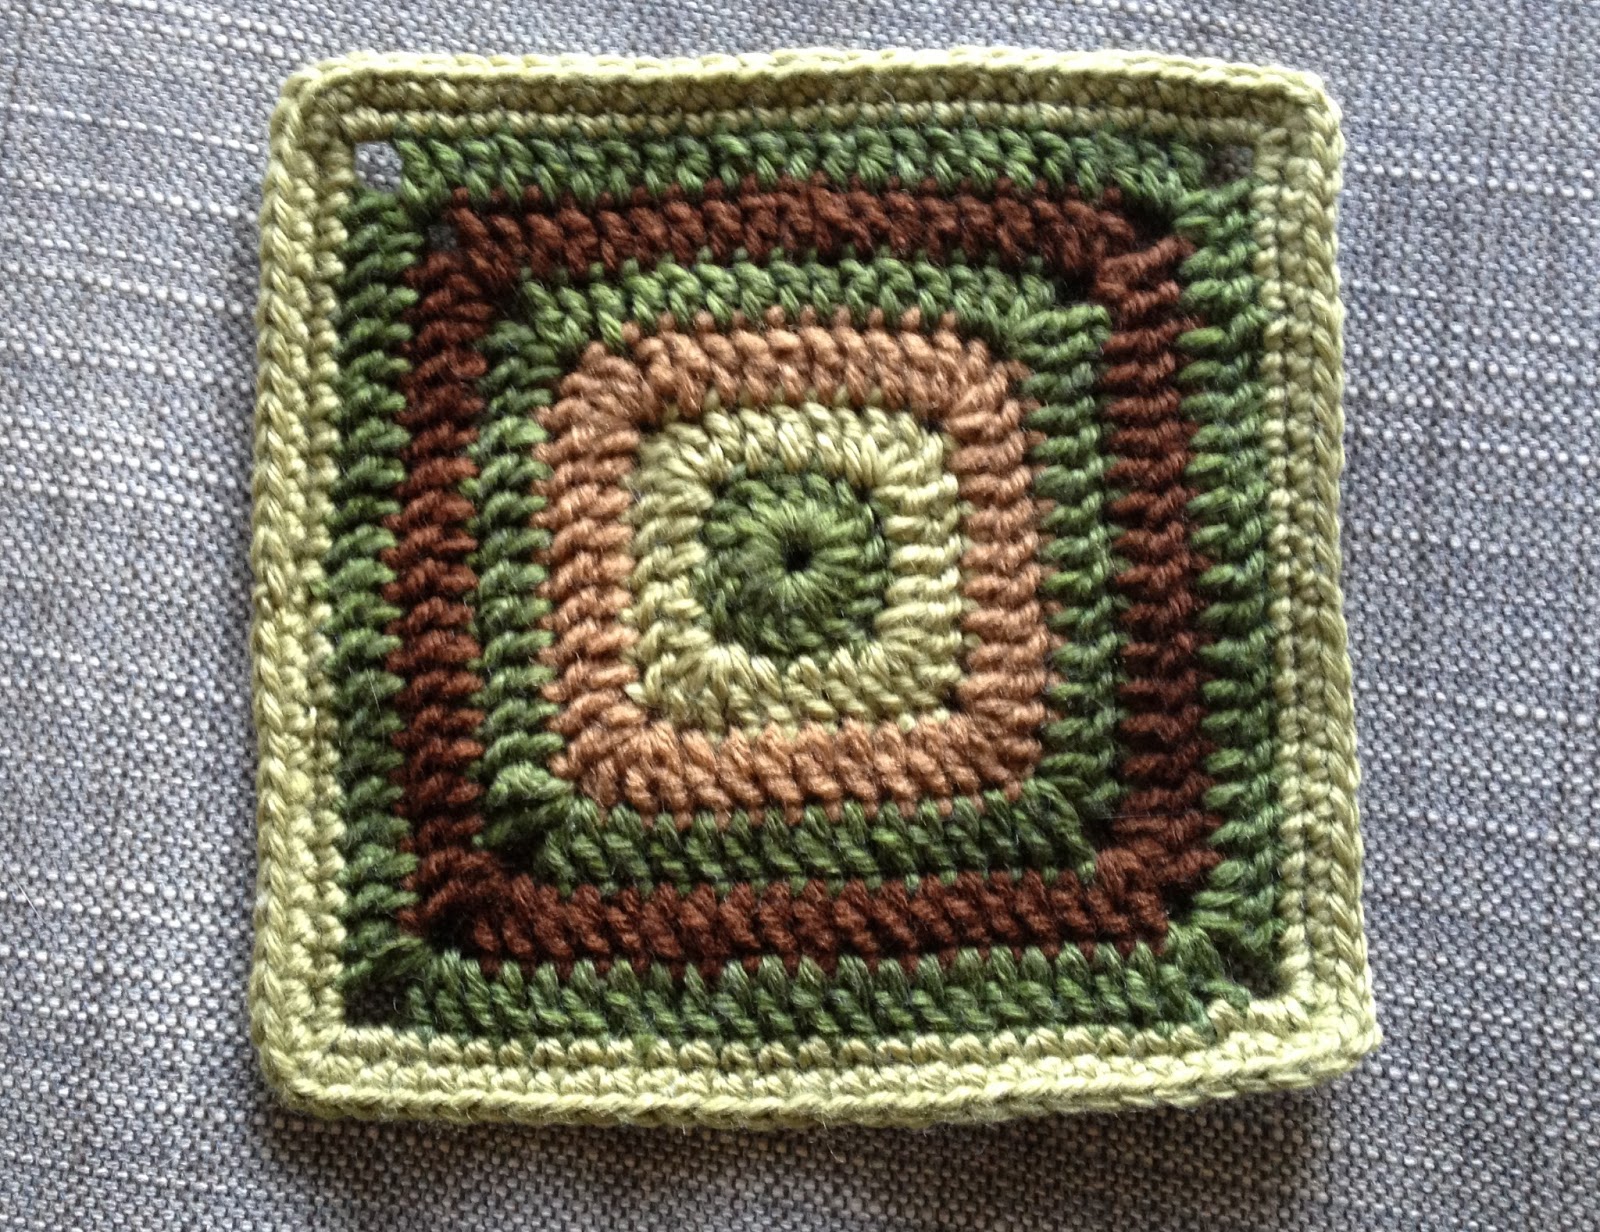
Next I started on colours for the "Into the Blue" block - which should probably be re-named as "into the green" or "into the earth" with this colour scheme - and again ran into the problem of the bright green and dark green being so different that the effect is jarring.

So I went out and picked up two more greens to add to my yarn supply for this project. I got a medium dusty green (seen as the main colour below), and a lighter medium almost yellowish dusty green. I made the square below and felt better about it, but it still wasn't quite right. I set it aside for the time being and started to work on the other blocks.


Thankfully the other squares went more smoothly overall.

For the Fretwork square I again tried to match the colours from the original pattern, this time with much more success. the only glitch was that it turns out that the beautiful bright blue is a much lighter weight yarn than the rest - I think it is closer to sock weight that worsted! So I ended up using two strands together and a slightly smaller hook for that part of the pattern. It was such a relief to have it work out the first time!


Next on the list was the Willow block. The first 3 colours went in and seemed to fit, but I originally did the edging with the dark green - and it was a bit too green. I also realized that I hadn't used the dark blue yet, so I gave that a try. It seemed to tie the colours together nicely, but I found that the block was a little small - so I added a third row of single crochet to the edging, and that did the trick.


The last block was the one I was least excited to make - unlike the other four (which are made in the round, and with mostly double crochet stitches), this one is made in rows, of almost entirely single crochet. That means it's painfully slow to make in comparison! I knew I wanted this square to include the orange (the bride's favourite colour), and probably green and brown - but which green  and which brown should I use? I experimented with several combinations, including using the orange for one of the larger sections, and pink for the stripes, but I finally settled for this combination, with the lighter brown, the "darker medium" green, and of course the orange for those highlight stripes.

The other annoying thing about making this square was getting the sizing right. It kept coming out too thin and tall. I tried taking out a row or two, but because of the 3 sections of this pattern, I had to take out 6 rows to keep the section even - one on each end of each wide stripe. But then I had an incredibly short and fat square instead, and the pattern was all distorted. So much for that idea! Instead I tried playing around with my tension and hook size. Did I mention that the brown was a bit thicker than the others, and the orange was a bit thinner? That made things even more complex. Finally I seemed to find a combination that worked - but every time I tried it, it seemed to come out a little differently. Oh well, I guess I'll just have to try my best with this one, and try blocking it at the end...?

Ok, so now I had four blocks sorted out, and one almost finished (the "Into the Blue" block that I was still not quite happy with above). Here are the blocks all together so far. Looking pretty good, except for that bright green centre on the Into the Blue block; that definitely had to go. 


Instead of making a whole new square to try something new, I made a new centre (using the lighter medium green) and laid it on top of the already-made square. Ah-ha! I think that will do it.

And here is the finished square - finally!
The five final blocks - at last!


Once I had these blocks finalized, I took pictures of each of them and loaded them back into Powerpoint, and re-created Design #2 with the real colours. Looks ok, but I think the striped block is overpowering, and frankly after making each of the starting squares, I knew that it was going to be my least favourite square to make (and the slowest), so the idea of making so many extra of the design was a little painful. So I needed to create a design that would keep the diagonal idea, without over-loading on any one square.


The arrangement of the other four squares in the above design was a bit complicated, so I decided to keep it simple and use a diagonal line of each of the five squares. Of course this plan calls for 77 blocks (7 x 11) - time to take a deep breath and get started!


Unfortunately now that I've got this finally figured out, we need to start packing for the big move. I'll have to pack up most of my yarn, but leave out enough of each colour to keep me going on the road.

That's it for now, keep crafting!

The Big Surprise Project Revealed - Part 3

Well, after many delays along the way, I've finally (in early November) gotten into the swing of making the squares for this blanket.

Delays? How could there be delays?

Well, as I mentioned in Part 1 & 2, it took me quite a while to settle on yarns, and colour patterns for each square, and then the overall layout of the blanket, which would determine how many I would need of each square. So that took me into mid October.

Then we moved halfway across the country, so packing, organizing, cleaning, and wrapping things up took up lots of my time at the end of the month. Not a whole lot of time left for crafting, though I did try to do a bit each evening to unwind.

Leading up to the move I carefully planned which yarns (and how much of them) to bring with me in the car (rather than sending in the moving truck), because I envisioned having four days of the drive to work on this project. As I mentioned in this post, my husband loves to drive and hates being a passenger, so I thought I would have lots of time to crochet (four whole days!). So, I packed all the various colours needed for this project (that was 10 if you're keeping track) into one of my shoulder bag carrying cases, and gave up about half of my minimal leg room in the car so it could be accessible throughout the trip.

Turned out that I didn't get much chance to work on this project on the drive after all - first we decided to go a different route, which shortened the trip by a day. Then our cat was crazy for a good chunk of the trip, so that kept my hands and attention busy a lot of the time. And in the time when the cat was calm and/or sleeping, I spent a chunk of it making the animals mentioned in this post. Given how few squares I made on the trip – one, maybe one and a half? – I felt more than a little silly for bringing so much yarn with me in the car, and having very cramped leg room as a result, when a much smaller bag would have done the trick and been much more convenient.

Anyway ... we arrived in Saskatchewan at our new place about a week ago, and since then I've made more progress in terms of actual squares produced than I did in the last three months combined! I don't have a job here yet, and most of our stuff is still on the moving truck en route to us, so the unpacking is stalled for now... which leaves me with time to get into a productive pattern and really race through making these squares! I've gotten to the point where I've internalized most of the pattern for four of the five squares, and I can make the same square several at a time by batch-making each step. Here you can see I'm making four of the same square at once:


Since the truck has been delayed (the main highway through northern Ontario was completely washed out for several days), and I've become so productive, I am now extremely glad that I brought as much yarn as I did! At this rate I may well still run out of a couple of key colours before the rest of my stash gets here, so I'm very thankful I didn't leave myself with even less!

Here are all the total squares I've made in the last week alone (eleven finished, eight more at least part-way done) - not too shabby, huh?


That's it for now - keep crafting!

Thursday, 11 July 2013

The Big Surprise Project Revealed - Part 1


Ok, so it's early October 2012, and I've been working on this surprise project since the end of August (see this post). Since this project is a surprise I won't post these entries until I've already given it away, in May 2013.; but since this is the largest crochet project I've ever done on my own, I wanted to keep track of my progress along the way.

One of my very best friends (she's in the picture with me above) is getting married in May 2013 in Europe. Our plan is to attend the wedding, but as my husband and I are both starting new jobs in the next few weeks, we don't know for sure if we'll be able to get the time off yet. Just in case we can't attend, I wanted to have an amazing and personal gift to give them to make up for not being there. And if we can go, well it will still be an amazing and personal gift, but I'll get to see them open it!

Back when I was working on blanket squares for the group blanket that my handcrafts group Stitch for Good was making together, the bride-to-be mentioned how lovely it would be to have a blanket like that one. At the time I said something non-committal but I mentally filed it away as an epic gift idea.

When she announced that she was engaged (to a lovely guy who is perfect for her, happily) and they set the date, I began plotting to make them a blanket from squares like the one she had commented on. Nine months should be enough time... right?

The biggest crochet project I had done to date was that group blanket project, for which I only made about one quarter of the squares. So this will clearly be a bigger undertaking (especially since this one will be a larger blanket too), but also I'll be able to avoid some of the headaches that came with that group project (much more consistent gauge, for one), so overall I was excited to get going.

First I needed to choose colours for the blanket, get the yarn, select which patterns I would use for the squares, and then decide how to arrange them into a coherent pattern for the overall project.

Let's start with colours. They are both very down-to-earth people, they both do research on plant genetics, and they enjoy being outdoors, so greens and browns (earth tones) came to mind, and so I decided that the "main" colours would be several shades of greens and browns. They also both have a lovely sense of humour and are a bit quirky, so I also wanted to include some brighter highlight colours. Her favourite colour is orange, so that had to be included of course.

So with these general ideas in mind, I started poking around in yarn shops and craft stores to see what options would be available, without breaking the bank. While I was considering this, one of our local craft stores had a big sale on mill-end bags of yarn – which is already the cheapest way to get yarn - a discount of $2 off each bag. So I went to have a look at their offerings (the biggest selection of mill ends I've ever seen) to see if I could find anything that would work for me.


They had a couple of shades of green, and a nice orange, and also some blues and a pink that I thought would work well. They didn't have any browns though, so I settled on getting some "big ball" skeins of two different browns, to go with the mill end yarns. As far as I could tell all of the mill end bags seemed about the same weight and same fibre content, but they never tell you anything on those bags, so it was a bit of a gamble, but what's life without a little risk, right?

To be continued...

Tuesday, 22 January 2013

Xmas Gift Crafts Part 1 - Slippers Great and Small

Ok, now that all the gifts have been given, I can finally tell you about all the projects I've been working on! So here is a brief showcase of some of the gifts I made for family and close friends this year. I've split this post into 3 parts to make each post a reasonable length.


Xmas crafts Part 1: Slippers Galore!

I made four pairs of slippers for gifts this year - for both my parents and both my in-laws.

Quick and Chunky Slippers:

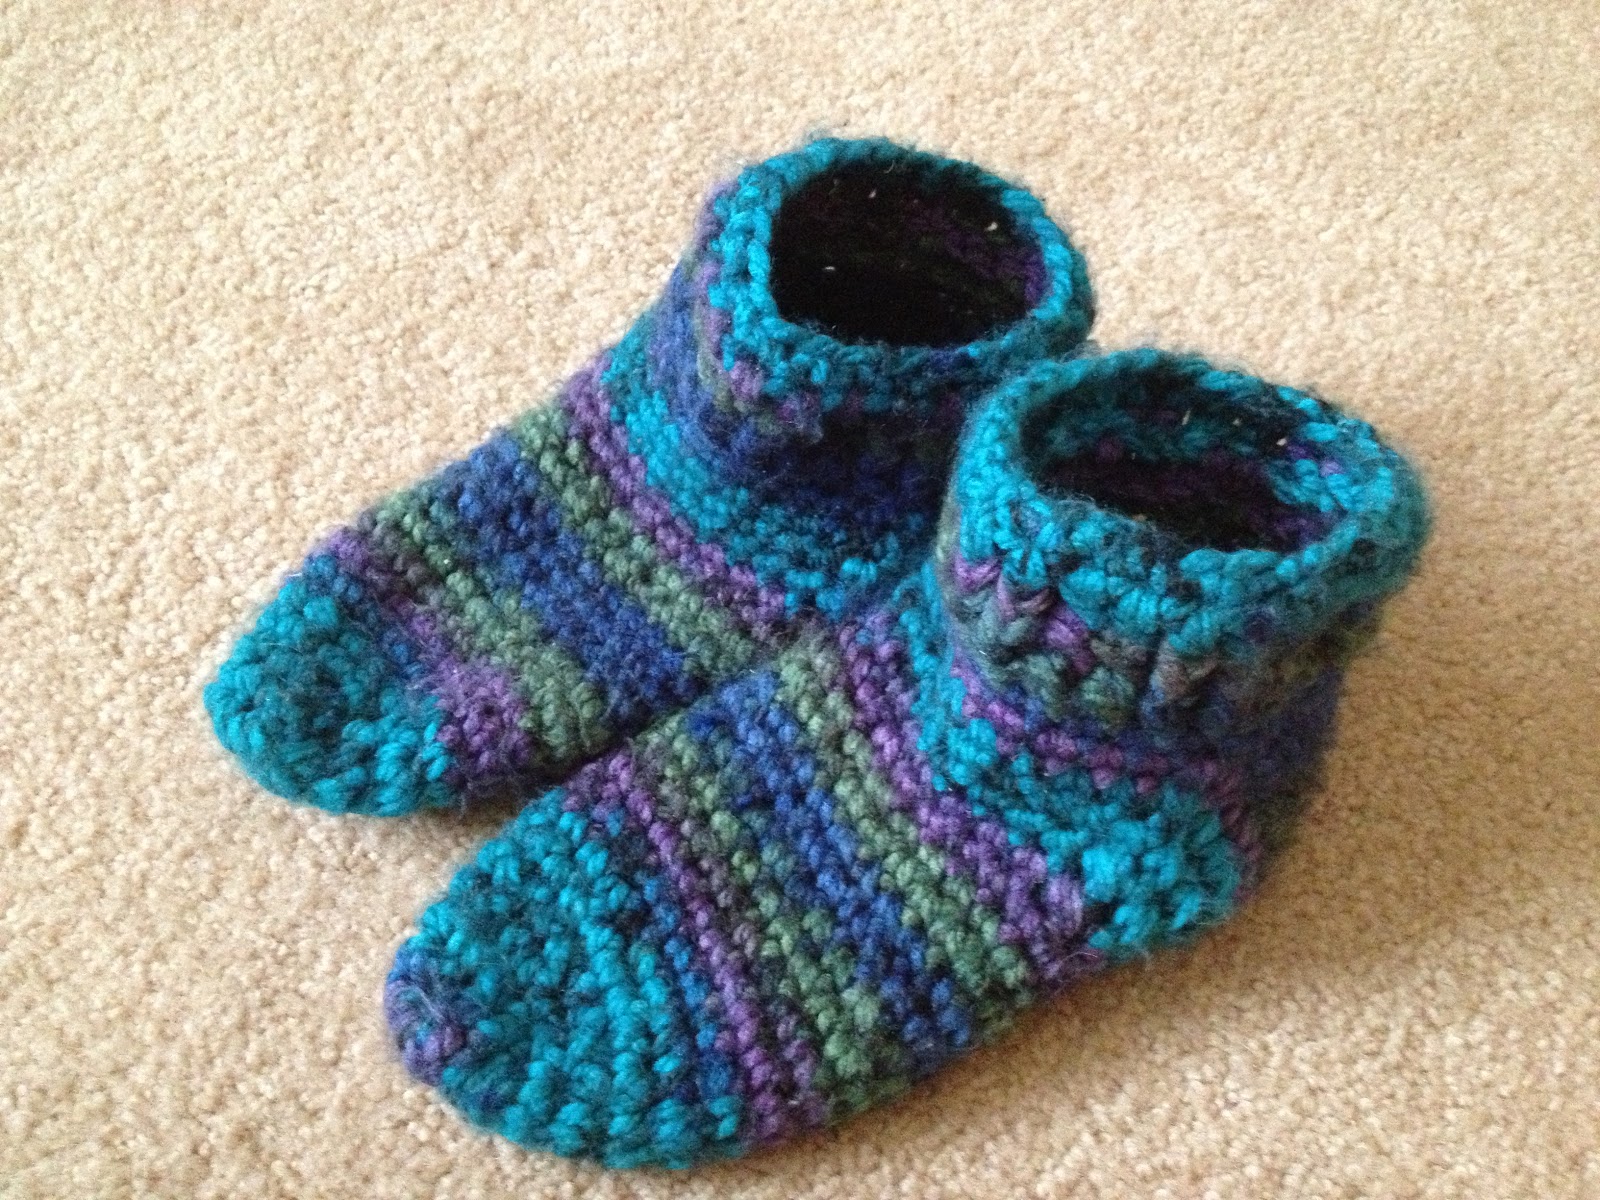
For my mother and my father-in-law, I made these chunky bootie-type slippers, using bulky weight yarn, using this pattern I discovered and adapted for myself before the holidays. I used the same type of yarn as I had for my own pair of slippers (Loops & Threads Charisma), selecting different colours for each of them. Most of the Charisma yarn is in multi-colour skeins, which makes for really interesting designs on the slippers, with a relatively simple pattern. I chose a Grey, Black and Brown yarn for my Father-in-law, and a lovely earthy yarn in Greens and Browns for my Mum.

Here's how these two pairs of slippers turned out:

Grey, Black and Brown Slippers in Men's size 8 for my Father-in-law


Green and Brown slippers in Women's size 9 for my Mum


Lizzie Slippers:

For my mother in law, who is often too hot even in the winter, I knew she wouldn't like the thick, chunky slippers. So I made her a pair of Lizzie slippers instead. These come from a great pattern on one of my favourite craft blogs http://goodknits.com


They're just so sweet and stylish and original! One of these days I'll have a chance to make a pair for myself!


An Ill-Fated Project:

I was originally planning to make the same type of Chunky slippers for my dad too, but at the end of November he mentioned that he had worn right through the soles of some slippers that a family friend had knit for him a while ago - so I picked up some of these leather slipper soles (called Boye "Starting Points", found at many craft stores), to make a pair of slippers with really durable soles.

I had picked up the largest size of these soles available, which was labelled "Large - Women's sizes 7-9, Men's sizes 6-8." Since my Dad's feet are size 9.5 or 10, I had a sinking feeling about how this would turn out. However when I measured them against charts I found online of foot length by shoe size, it seemed possible that they might work out afterall - (maybe the manufacturers were off a bit in their sizing...). So I crossed my fingers and made them anyways, hoping for the best.

I intended to find a pattern for them online that I could at least use to get me started. Turns out that the only patterns I could find for these slipper soles was this list - most of which are knitting patterns, and the couple that were crochet patterns didn't appeal to me at all.

Therefore, I had no choice to make up my own pattern. Luckily my friend in Regina has a pair of slippers that she bought (and loves), which are built on soles similar to these ones, so I could at least take a look at hers to get an idea of how to start. It turns out that her slippers actually only used half of the teeny-tiny holes that are punched around the edge, and they clearly cut them to be bigger. I was planning to try using all of the holes, so I clearly had to change my pattern significantly from what had been used for her slippers – unsurprisingly it turned out quite differently. I am quite happy with how the pattern turned out, and I will post it here as soon as I've had a chance to write it out properly.

Unfortunately, while I was working on these slippers I managed to break one of my lovely wooden Harmony crochet hooks (which were a birthday present this year) while using it to try to get the yarn through those tiny holes - arg! Word to the wise - always use a metal hook when dealing with a tiny hole in leather!

Despite my concerns about sizing, and the crochet hook tragedy, here is how they turned out:


Unfortunately, that was not the end of the story - my worst fears about this present came true, and they didn't fit. Yes, he could get them on his feet, but they pinched his toes and were uncomfortable to wear. Not exactly the feelings you want from a new pair of slippers! ARG - So much for that present!

Over the next few days I searched online and everywhere I could think of for a larger size of this type of slipper sole, with no success. I finally decided to make another pair of the same Chunky slippers that I'd made for my Mum and Father-in-law, and then sew some sort of fabric or other material to the bottoms to reinforce the soles.

I made tracings of my Dad's feet, and got to work on the slippers. I adjusted the pattern from the largest size I'd made so far (Women's size 9), and luckily my Dad was around while I worked on it, so I could get him to try them on as I worked. After a couple of adjustments, I got the sizing right for the basic slipper. These slippers stretch out quite a bit as your wear them, so I couldn't attach the soles right away, since the slippers weren't the right shape yet. I had him wear them for a few hours to stretch them out, and then I was ready to reinforce the soles.

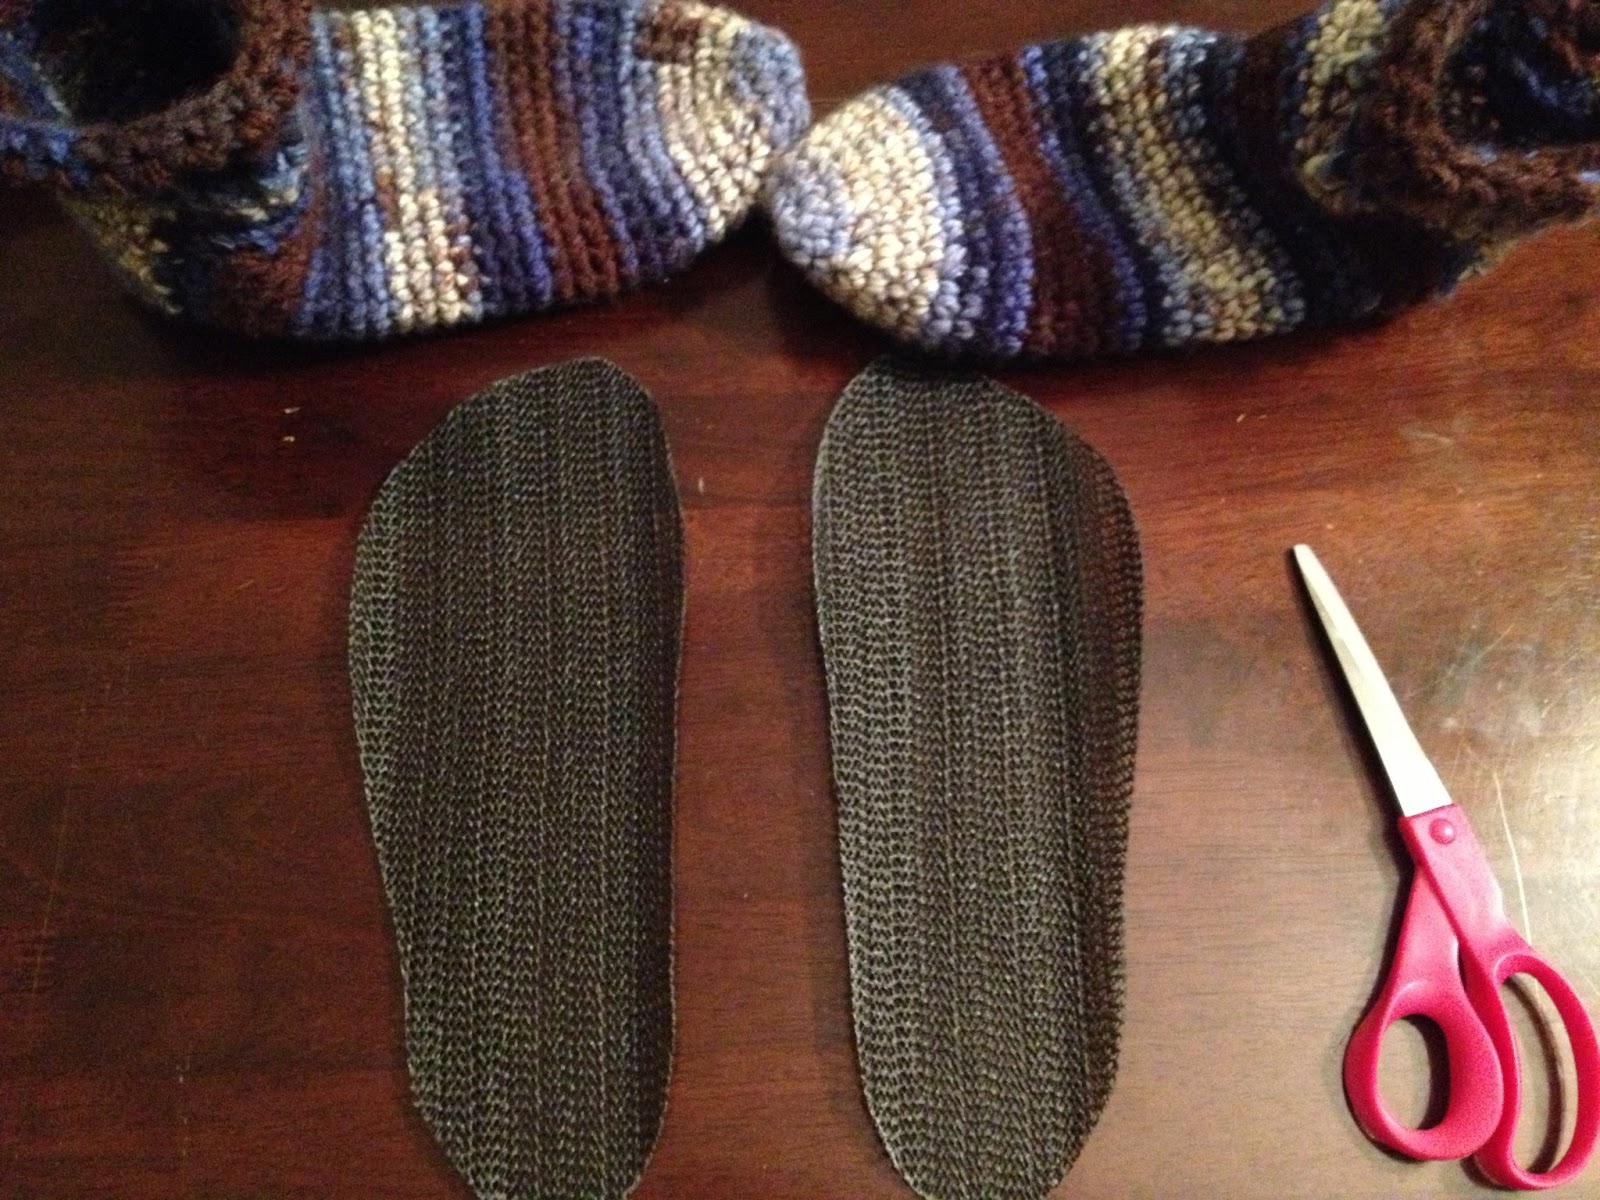
I was originally going to try some faux suede fabric, but I was concerned that this material wouldn't be flexible/stretchy enough to be comfortable. Then someone at my Saturday stitching group mentioned that she had successfully used this rubberized material (the stuff that you can use under carpets, or to line drawers, or to help open jars) for this same purpose. This sounded like a better solution, so I tracked some down - I found it at a dollar store, though I'm sure lots of other places would have it too.

Then, I used the same tracings to cut out some of the material, cutting it a bit larger than the tracings to allow a bit of flexibility when attaching it, and make it less likely that he'd feel the edge of the soles as he wore the slippers.


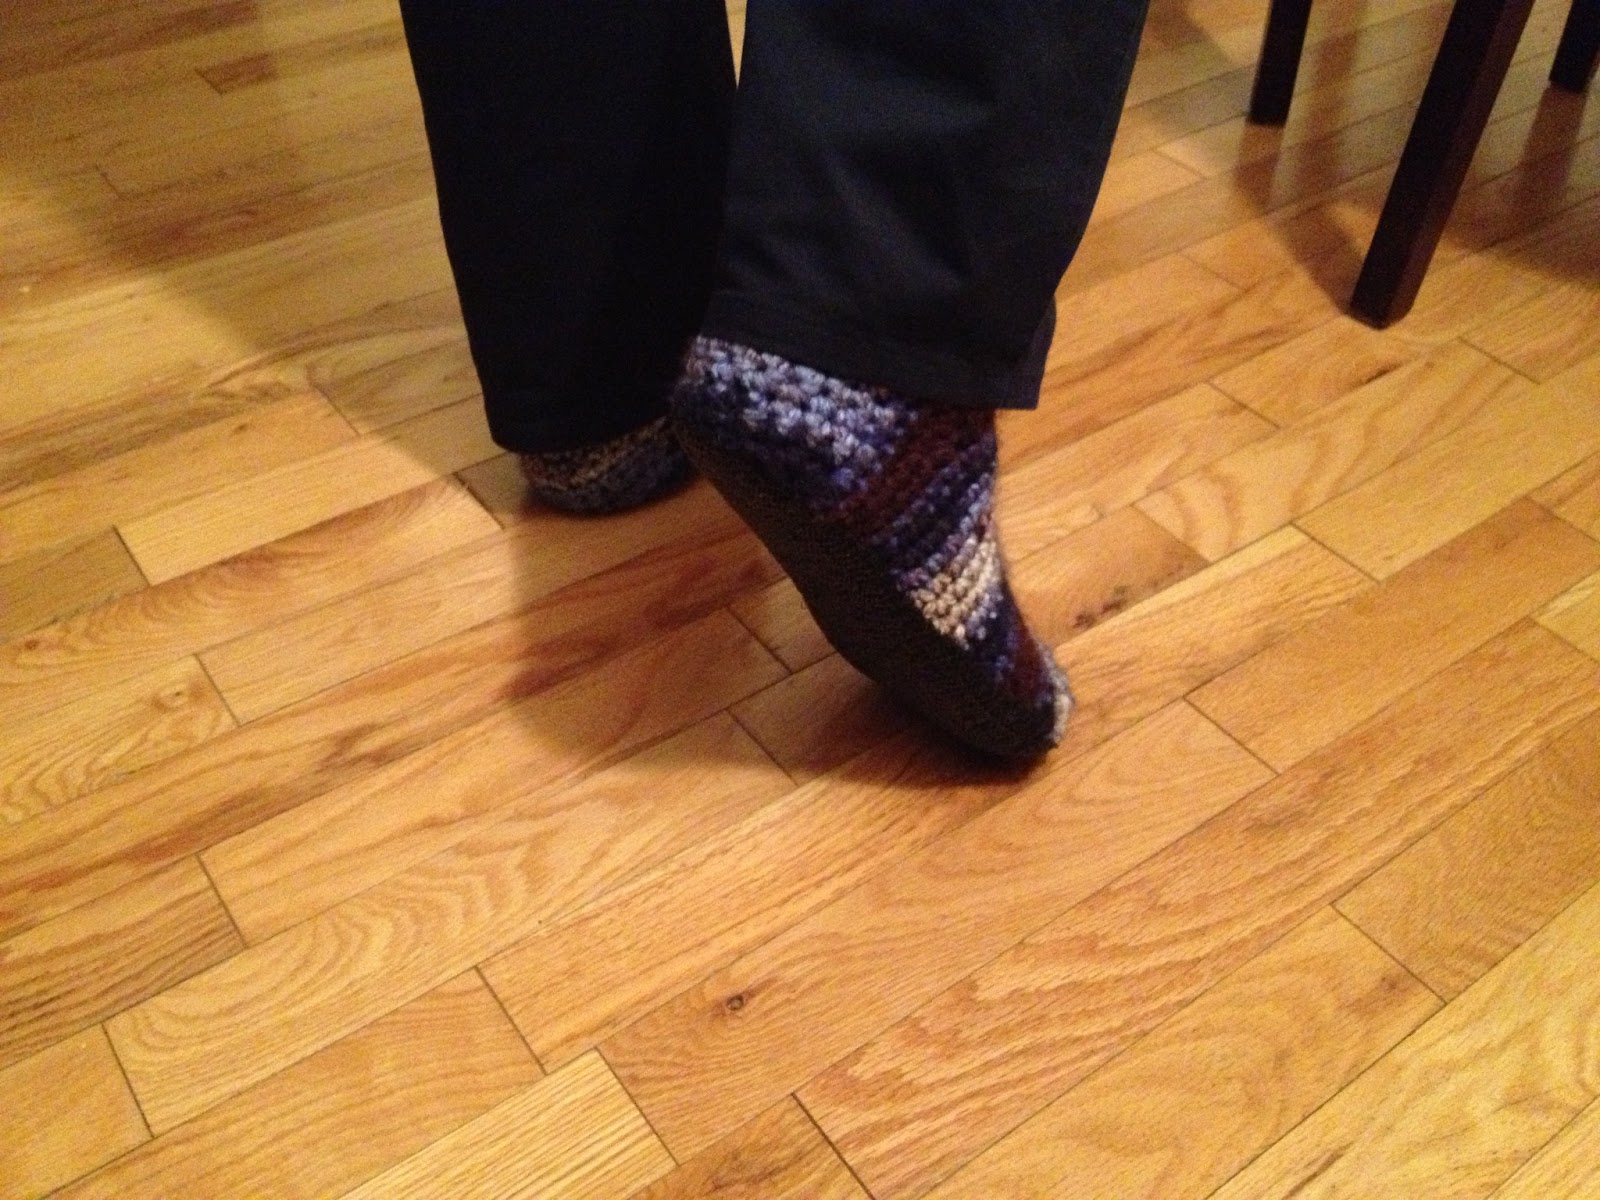
With a bit of stretching and fiddling, I got the soles pinned in place, and then stitched them on by hand. I also did some stitching across the middle of the soles so they would stay in place on the bottom of the slipper, rather than getting folded or pinched on the bottom.


Here my dad is modelling his new slippers with their reinforced soles. Looking good!


And here is a shot of my parents and I all wearing our matching finished slippers. Look at all those cozy toes!


After making these slippers for my Dad, I think I may need to add some of that reinforcing material to my slippers, as I'm starting to wear through them too. In fact, it might need to become a regular part of the pattern.

Edit: These slippers (with the non-slip soles) are now available in my etsy shop

Ok, that's it for slippers – more types of xmas gifts are to come in two more posts.

Keep crafting!

Friday, 4 January 2013

Finding the Perfect Slipper-Boot Pattern


What is a more obvious practical item to crochet or knit when the weather gets cold than slippers? Okay, okay maybe a scarf is more obvious – and to tell you the truth, the first year or so that I crocheted I made almost exclusively scarves (and simple blanket squares)... but when you're sitting there crocheting and your toes get cold, it's not a big leap to think "Hmm... I could make myself some slippers!"

Last year my mother-in-law knit me some lovely thick & warm slipper-booties for xmas, and it was a perfect present! Their house is quite chilly, so it is now almost a ritual that I put on those slippers as soon as I walk in the door to their house and leave them on until bedtime – in fact I keep them at their place so I can't forget to bring them when I visit!


Sometime later a friend expressed interest in making some slippers, so I did a quick Google search and found this list of 5 patterns - http://whipup.net/2011/07/14/5-crochet-slippers-to-make/
I particualrly love the mary jane slipper pattern - it's very simple, and works great. Look at this link: http://goodknits.com/blog/mary-jane-slippers/ (Great name for the blog too, huh? "Oh my good knits!" - so clever.) When I first found this pattern one of my friends whom I had recently taught to crochet immediately started making them for herself and for her family members, and they've been a hit!

The first pair that I made for myself were way too big – I kept thinking that I wanted them to be comfy, not pinching my toes, so I made them a little loose... and of course as soon as I wore them for an afternoon, they stretched out so much that they were falling off my feet! So I started over, making them quite a bit tighter, and they worked out much better, and became my everyday slippers.

As much as I liked the look of these slippers, they aren't the most practical for keeping your toes toasty on really cold evenings - what I really wanted was to make myself a crocheted equivalent to the knitted booties that I had left back in Ontario at my in-law's place. It was surprisingly hard to find a crochet pattern for adult-sized booties in a chunky yarn! Finally after lots of searching, I found this cheap pattern for some quick & chunky slipper boots – or as the pattern calls them, "Serenity Forest Slippers" –  http://www.free-crochet.com/detail.html?code=FC01044&cat_id=332

I gave them a try and Hooray! Exactly what I was looking for! Made with bulky weight yarn, these worked up really quickly (I made a pair in an evening). I have a couple of issues with the original pattern though, so I adapted it a fair bit - I will try to get it written up and posted it here soon. Meanwhile, here is the finished product, made with Loops and Threads Charisma yarn, which is a lovely soft and chunky acrylic that comes in a great range of multi-coloured skeins.


These have been a real success – I wear them almost constantly when I'm at home, and I'll even bring them with me to friends' homes when we visit, to keep my toes nice and cozy :)  And as you'll soon see – once I get my Christmas present posts finished – I made a few pairs of these for Christmas presents!


Keep crafting!
Taking care of business

It is amazing sometimes the way things work out. It's a bit hard to believe, but between the time that I completed those Converse booties, informed my friend, and posted them here, but before she completed the sale on my Etsy store, someone beat her to being my first official sale!

I woke up Sunday morning to a request from a potential buyer to waive shipping fees since she also lives in Regina, so I set up a local delivery code that I can provide to local buyers to receive free shipping (why didn't I think of this before?), and before I knew it I had my first sale!

She had requested a smartphone sock, like these ones that I made for my husband's phone (black, for the iPhone 5), and for my phone (purple & blue, for the iPhone 4/4S).


I had made these back in the fall when we first got these new phones, using sock yarn to keep them quite slim, but still providing protection from scratches and small impacts. In fact, I decided to make the one for my phone after I took it into a cave with me at work (I used to lead Outdoor Ed field trips) so that I could check the time, and I dropped it in the cave, slightly damaging the casing. Luckily I had other, unrelated problems with the phone and they replaced it (apparently without noticing the small dent in the phone) – at which point I decided a case was required to prevent a repeat of the same mishap!


Back to the current item:
On my store I had posted images of all the socks yarns that are easily available to me, and customers are asked to select from this image. She selected colour 2 from the variegated yarn options you can see below.


With these variegated sock yarns it's always a bit of a mystery what the pattern will look like in the end. I kept my fingers crossed that my buyer had noticed that there was a significant amount of yellow in the yarn, and wouldn't be surprised or disappointed about it!

I worked on this case in the drive back to Regina from my parents' place in Calgary, on Tuesday (yes we travelled on New Year's day), and put the finishing touches on it yesterday.

Here it is, the finished custom-made phone sock.


Then I had to figure out how I would package my finished items so that they looked nice when they arrived. I decided to wrap them in tissue paper, to keep them neat and tidy and somewhat protected inside the shipping envelope (in most cases, though obviously this one isn't being shipped so it was delivered just in the tissue paper). Here it is all ready for delivery:


As you can see, I also made myself some basic business cards to include with each order - including a little word cloud (www.wordle.net) I created about my store. I will probably order some professionally made cards eventually, but I think these will do nicely for now! Here's a close up:


Since this was a local delivery item, I dropped it off at her house (she was at work at the time) and she got it last night. She sent me this comment, which made me quite happy about my first sale:

"Got it! Thank you very much! It looks great, and fits my phone snugly. Very impressed! I could see myself bugging you for another in the future"


I guess with this sale I'm officially in business!

Keep crafting!


PS: You can find this item on my Etsy store here

Sunday, 30 December 2012

By Request: Converse-Style Rainbow Baby Booties

I've just completed my first order by request - and here they are! Converse-style rainbow baby booties!


When I recently posted my "Rainbow Collection" of items (with the tag line "Kick the Pink and Blue Habit - Give Baby a Rainbow!) on my Facebook shop page, a friend immediately suggested some brightly rainbow coloured items, to add to the pastel rainbow items I already had.

I thought this was a great idea, and one I've been wanting to explore, so I picked up several skeins of nice and soft, brightly coloured yarn at a nearby store while visiting my in-laws for the holidays. I was itching to make something with these gorgeous colours – the colours are so juicy and luscious I could eat them! – but I didn't know what to start with.

So of course, it was time to use the power of Facebook. I posted a call for requests for my first bright-rainbow items, and within an hour I had a request, (from the same friend who requested the bright colours in the first place),  for "rainbow baby booties! with a white star on the side (like where the converse spot goes)" - AND an offer to buy the first pair! This is my first custom order so I was very excited, and I wanted to get working on them right away.

First I looked up a baby shoe size chart, since she requested a 0-6 months size:


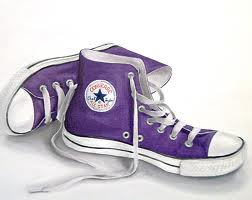
Then I did some Google-image search reconnaissance to remind myself of the key elements of the Converse style - white soles, white cap-toe, white laces, and a white circle/star on the side. Seems totally doable! 


I worked up some white soles from my baby bootie pattern, and checked the size against the chart. Then I started altering my pattern to create the cap-toe effect. The first pair I made the toe was too large, so I started over. I didn't have any white in the same yarn as the rainbow stripes, so I used some Xmas yarn that has a silver thread in it, which produced a sparkly effect. When is it ever a problem to have a little extra sparkle? I did pick up some plain white yarn, so the next pair I make probably won't have the sparkle.

I tried crocheting a star to stick on the side, but I couldn't make one small enough with the yarn I had, so I embroidered one instead. The first attempt (which I made on the shoe with the extra large toe, to practise on), was a bit bulky using white yarn, so I tried embroidery floss and a regular sewing needle instead of a yarn needle to give me a bit more precision, which was a major improvement. Looking at the star it felt unfinished without the circle, so I added a circle around the star, and yup, that was the look I was going for! 


Finally, I added the little embroidered laces, and the effect was complete! Here they are!


I was visiting some friends while I was working on these, and they recognized without me telling them that they were Converse style, so I count that as a win! 

I've now let my friend know that they're ready, and I posted the item in my store so she can order them, and I can get my first sale in the Etsy shop.


Keep crafting!